Three operating systems, three file systems, three methods to zero out disk space. Fortunately, they are all pretty simple. Doing this is a good idea right before creating a drive image for backup, as it makes compression more efficient.
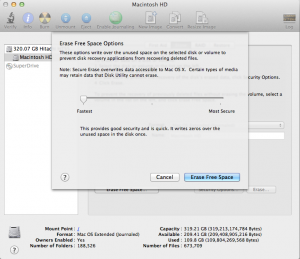
OSX – HFS+ (Mac OSX Journaled)
- Open Disk Utility
- Click on the OSX partition
- Click Erase from the tabbar menu
- Click Erase free space… button
- Choose the Fastest option – this will fill the partition with zeros one time.
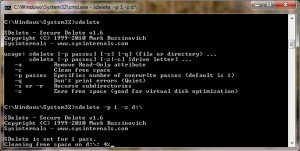
Windows 7 – FAT32, NTFS, exFAT
- Download SDelete from Microsoft Technet
- Copy sdelete.exe to C:\Windows\System32 (or any folder in your system PATH).
- Run SDelete from the command-line using:
sdelete -p 1 -z c:\
(where ‘c’ is the target drive letter)
Ubuntu – ext3, ext4
- Install the secure-delete package:
sudo apt-get install secure-delete
- Use fdisk to find the correct drive partition:
fdisk -l
The drive in question will be something like /dev/sda or /dev/sdb. Each partition is numbered, like /dev/sdb1 and /dev/sdb2
- Mount the drive partition (if it is not already):
sudo mount /dev/sdb1 /mnt/hdd1
- Run
sfill -Ilz /mnt/hdd1
where ‘hdd1’ is the location of the mounted partition in the filesystem.


April 19, 2013 at 3:03 am
With Linux (Ubuntu or RedHat), the “sfill -Ilz” command doesn’t works fine with ext3, ext2.. and others file system formats. It’s likely that the space is increased rather than reduced.
I have test this on 2 VMs with ext formats and different linux OS.
Regards,
Drk.
May 30, 2014 at 11:48 am
In Linux, another way to do this is use dd and /dev/zero. To fill up a filesystem, do something like:
dd if=/dev/zero of=/path/to/zero.file; rm /path/to/zero.file
This will fill it up with zeros, then delete it.
If your system is carved up into multiple partitions, you’d execute the above command such that the zero.file ends up somewhere in that filesystem.