MK802 II
I recently bought a Mini PC. It’s one of those ‘Android on a stick‘ devices from China, that cost anywhere from $50 – $90. This one in particular is a . It’s got an Allwinner A10 System on a Chip (ARM Cortex-A8, Mali400 Gfx), 1GB DDR3, and a 4GB of onboard storage with Android 4.0 pre-installed. It came with some USB adapters and a nice box, all for $55 shipped. The best part is, you can slip in a micro SD card with an ARM compatible Linux image, and it will boot!
Linaro 12.07
Miniand.com has several SD card images ready to download for this particular device, and I settled on a custom build of Linaro. It’s an Ubuntu 12.04 derivative with support for ARM devices. The custom build on Miniand has Mali 400 gfx drivers, and apparently a bunch of ARM related kernel optimizations and drivers for the MK802.
It was super easy to install – just download, unzip, and write the image to the card using a single dd command.
File: linaro-alip-armhf-t4.7z
Commands:
dd if=/dev/zero of=/dev/sdz bs=1M count=16 conv=fsync
dd if=linaro-alip-armhf-t2.img of=/dev/sdz bs=16k conv=fsync
NodeJS 0.8.11 and Yeoman
With the MK802’s primary function being a web development sever, my first task after getting the OS up and running was installing Yeoman. Linaro includes apt-get, so the installation process was mostly identical to what I have outlined in this earlier post. There were a couple key differences, though, that nearly derailed the installation.
Because most default build configs are set up for x86 systems, I had to take an alternate route with Git, NodeJS and PhantomJS due to the ARM based architecture of the MK802. For Git and Phantom, I went with the pre-compiled packages available in the apt repository. I won’t get bleeding edge versions, but from what I can tell so far, the repo versions work just fine.
Except Node. The apt repository installs NodeJS 0.6, and does not make 0.8 available. Problem is, Yeoman requires 0.8, and the default NodeJS 0.8.11 build instructions fail on the MK802. Luckily, there’s a pretty solid community of very-tiny-pc enthusiasts, and I was able to find a solution on . All that’s needed is adding a couple lines to a file before building.
Open up /deps/v8/build/common.gypi and change:
{
'variables': {
'use_system_v8%': 0,
'msvs_use_common_release': 0,
...
to this:
{
'variables': {
'armv7%':'1',
'arm_neon%':'1',
'use_system_v8%': 0,
'msvs_use_common_release': 0,
....
Compiling NodeJS took about an hour on the MK802. I think there were some additional arguments for the make command, but unfortunately I didn’t write those down. They probably weren’t that important anyway. Sorry :P
Cloud9
Here’s where things got really hairy. Cloud9 just did not want to cooperate. In retrospect, it really only came down to one (maybe two) issues, but working through the entire installation took the better part of my Saturday.
It all started with the ‘sm’ module from npm. Apparently ‘sm’ is the smallmint package manager used by Cloud9 to keep its own node packages separate from those of npm. Installing sm via npm went OK, but downloading the Cloud9 source with sm failed. I had to use git instead.
Download and install Cloud9:
git clone https://github.com/ajaxorg/cloud9.git cloud9
cd cloud9
sm install
A ton of scripts and package installations executed, and I eventually ended up with an error like this:
Checking for program g++ or c++ : /usr/bin/g++
Checking for program cpp : /usr/bin/cpp
Checking for program ar : /usr/bin/ar
Checking for program ranlib : /usr/bin/ranlib
Checking for g++ : ok
Checking for node path : not found
Checking for node prefix : ok /usr/local
'configure' finished successfully (0.970s)
Waf: Entering directory `/home/root/o3/build'
[1/3] cxx: hosts/node-o3/sh_node.cc -> build/default/hosts/node-o3/sh_node_1.o
16:01:40 runner system command -> ['/usr/bin/g++', '-g', '-O3', '-msse2', '-ffast-math', '-fPIC', '-DPIC', '-D_LARGEFILE_SOURCE', '-D_FILE_OFFSET_BITS=64', '-D_GNU_SOURCE', '-DEV_MULTIPLICITY=0', '-Idefault/include', '-I../include', '-Idefault/hosts', '-I../hosts', '-Idefault/modules', '-I../modules', '-Idefault/deps', '-I../deps', '-I/usr/local/include/node', '../hosts/node-o3/sh_node.cc', '-c', '-o', 'default/hosts/node-o3/sh_node_1.o']
cc1plus: error: unrecognized command line option "-msse2"
Luckily, I discovered a related issue reported on GitHub. The libxml submodule is the offending culprit. The module depends on Ajax.org’s o3 project, which cannot compile on ARM as-is. The problem has something to do with ‘msse2’ not being present on ARM v7 CPUs. I’m not entirely sure what that means, but fortunately, someone has figured out how to modify o3 and libxml so they will build properly.
I checked out a customized fork of libxml into cloud9/node_modules/ and ran the build script (build.sh). Then I re-ran sm install for Cloud9 and everything went off without a hitch.
Thanks to Ian Corbitt’s blog and libxml fork. Below are the useful commands that got things going for me (start from the cloud9 directory):
cd node_modules
git clone --recursive git://github.com/iancorbitt/node-libxml.git libxml
cd libxml
./build.sh
After the installation was complete, I could start Cloud9 with ./bin/cloud9.sh -w /var/www/myProject. Then firing up a web browser and going to localhost:3131 brought me to the IDE.
Access Cloud9 Remotely
Running a web browser on the MK802 is painfully slow, and I don’t always have physical access to it anyway. I would much rather use my laptop or desktop to run the Cloud9 client. The first time I attempted to open Cloud9 from a remote computer, I was very dissappointed. All I got was a 503 error with no information. Turns out Ubuntu does not allow connections willy-nilly on random ports.
Enter Apache and reverse proxying. I never knew about this before, but I’m glad I ran across it. With a simple VirtualHost file entry, Apache can accept requests for specified domains & ports, and forward them elsewhere. So in my remote browser, I can call the IP address or domain alias of the Cloud9 server over port 80, and Apache will forward that requests to localhost:3131. Great!
All that’s needed are a couple Apache mods enabled
sudo a2enmod proxy_http
sudo a2enmod proxy
sudo services apache2 restart
Then create an empty file in /etc/apache2/sites-enabled, fill it with the information below, and restart Apache:
ServerName c9.mk802
ProxyPreserveHost On
ProxyPass / http://localhost:3131/
ProxyPassReverse / http://localhost:3131/
Then in the /etc/hosts file of my remote computer (where I will be using Cloud9), I add the entry: c9.mk802 192.168.1.xxx (where xxx is the last 3 digits of my mk802 IP address).
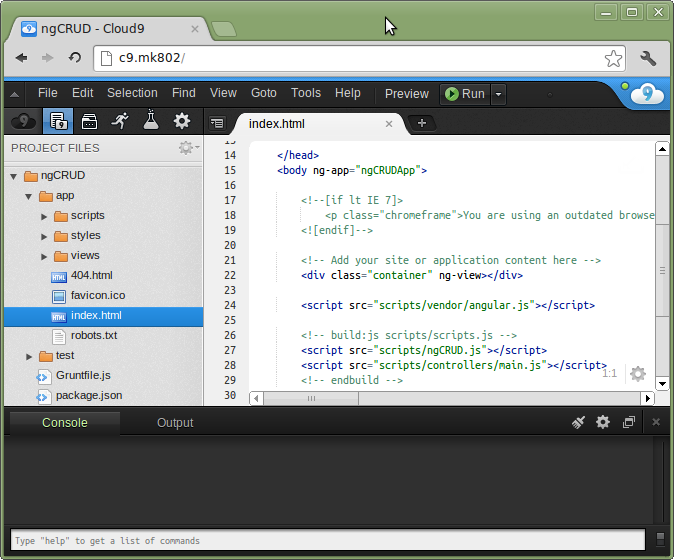
Opening up Chrome and tapping http://c9.mk802 into the address bar brought up the Cloud9 interface running on my tiny PC in another room. Excellent!
Except I couldn’t type anything or create any new files. Bummer :(
Cloud9 had started in Read-Only mode. After a bunch of trial and error, I finally found some advice stating that local installations of cloud9 would only be fully accessible to a single user via the host specified in cloud9/configs/default.js.
Open default.js and change all instances of “localhost” to “0.0.0.0”. Restart Cloud9, and all should be good and merry. Just make sure that Cloud9 is safely tucked away, as this really is not very secure.
It was pretty satisfying being able to create a fully functional development environment with two commands:
/var/www/myProject/yeoman init angular
~/Applications/cloud9/bin/cloud9.bin -w /var/www/myProject/
Now whether standing at my beefy desktop, or lounging with my li’l notebook, I can access the same codebase with the same IDE. Pretty nifty!


